Showing posts with label Tutorials. Show all posts

February 23, 2011

Reversible Skirt Tutorial for Baby


Welcome Friends!

This is a simple reversible baby skirt to make for a baby girl. The size will fit up to 3 months. You can adjust the size according to your skirt length and waist measurement. I love it, because it is quick and makes a great baby gift! Follow along, the pictures will give you step by step directions on what to do. If you are beginning to sew, this little BABY skirt will make you proud!


1. Materials: 1/4 yard fabric in two different coordinating fabrics and 3/8 inch elastic.
(Press your fabric before cutting.)

2. If you are using the same fabric for both sides of skirt, use 1/2 yard and cut in half.

3. Place right sides together and sew a 5/8 inch seam. You are sewing along the top edge lengthwise.

4. The photo above shows you how to place the right sides of fabric together and SEW.


5. Press your seam open so it lays nice and flat.
You now have one long piece of fabric measuring approx. 18" X 44/45 inches with two patterns of fabrics

6. Fold the fabric so you create a tube(bring the two ends together) with right sides together, sew a 5/8 inch seam.


7. Turn your fabrics to the right side. and press.

8.Measure top of skirt equally around the skirt, fold over and pin.
9. You are measuring to the size your elastic will fit through your elastic casing.
10. Repeat for both fabrics and pin. Press.


11. Sew a edge around the top of skirt approx 1/4 inch, this will give your skirt a tiny ruffle around the waist. Be sure to leave a opening to thread your elastic through.

12. Measure your elastic on top of your skirt and pin. This is your guide to sewing a second stitch around your skirt for the casing.

13. Thread you casing through your skirt casing with a large safety pin secured to your elastic.
14. Sew the casing closed. You are finished!

You now have a Reversible Skirt with two sides of different fabrics!
Great for Spring and Summer!
Celebrate!
It's time for Ice Cream!
Links:

February 19, 2011

Quilt Tutorial


Do you have a lot of fabric scraps that are looking at you and saying "Do something with me"? Here is an idea that may be of help. This quilt is easy and works up fast!

Supplies:

Fabric scraps for squares (48), approx।

1 1/4 to 1 1/2 yards of white,
1 1/2 yards for backing
1/2 yard for binding.
This quilt was made with 4" squares.

The beauty of creating your own is you can actually use any size square you want as long as you are consistent with the same size throughout this project. A CHARM PACK (5 inch square) would work wonderful and you already have the squares cut out. Even a LAYER CAKE (10 inch square) would work. You would adjust your white fabric measurements to fit the square size.
In this particular quilt there are 48 pink 4 " squares. It measures 37X47. Great for a baby quilt.


After you have your squares cut out ....... you are ready to cut the rectangles (the white fabric on this quilt). For this quilt I cut 2" strips the width of the fabric. ( from fold edge to selvage edge) Cut approx. 5 strips 2" x width of fabric. From these strips cut (42) 2" x 4" rectangle.


Okay now we have the squares and the rectangles. Now take a white rectangle and place it on the pink square lining the edges together. Sew a 1/4 inch seam along that edge.


Press seam to the dark ( pink square)
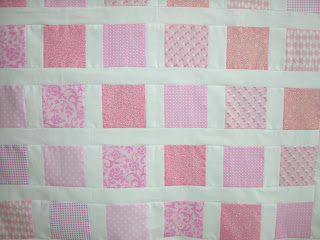
Add a pink square to the other side of white rectangle. Keep doing this until you have a row of six pink squares.

Press toward the dark. Make eight rows.
Now you are ready for sashing. Measure the six square row and cut seven 2" strips this length.
You are now ready to sew the rows to the sashing.
I am showing two rows of just two squares. When making the quilt you would use your rows of six square and five rectangles. When pinning the sashing to the row of squares start by pinning each end and then the middle and then pin each seam . You are redy to sew.


Continue sewing your sashing to your squares. Sew your rows together, press seams to one side after sewing each row. You will have 8 rows of six squares, which uses up 48 squares.
Come back for a continued tutorial on borders and binding.

The combination of color, pattern and design make this quilt fun to make.
We would love to see your finished quilts. Feel free to email us.
Thanks for visiting. We appreciate all of you joining our new blog! :)
Anne Moore Creations
Time is running out for Handmade Mary Engelbrite BAG and Heartfelt Creations Giveaway!